The Web Server (IIS) role in Windows Server provides a secure, easy-to-manage, modular and extensible platform for reliably hosting websites, services, and applications. With IIS 8 you can share information with users on the Internet, an intranet, or an extranet. IIS 8 is a unified web platform that integrates IIS, ASP.NET, FTP services, PHP, and Windows Communication Foundation (WCF). – Microsoft
Prerequisite
Microsoft Windows Server (below steps are using 2019 version, however, you may find 2012 to 2019 are slightly the same)
Objective
• Learn how to deploy IIS Server by GUI
• Learn how to deploy IIS Server by PowerShell
• Learn how to verify IIS installed inside the server
Installed IIS features using GUI
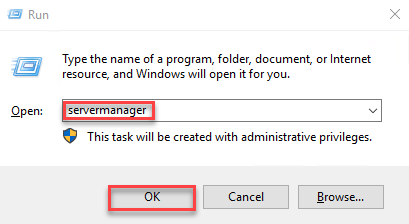
Step 1 : Open Server Manager
By default, Server Manager will automatically open when starting up Windows Server. Just in case if it is not, you may open using RUN: servermanager.msc
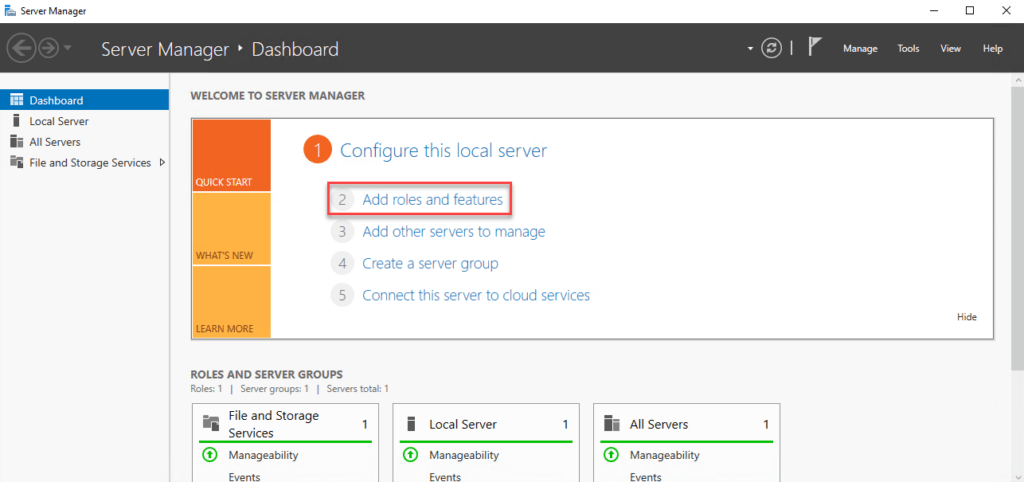
Step 2 : Add roles and features
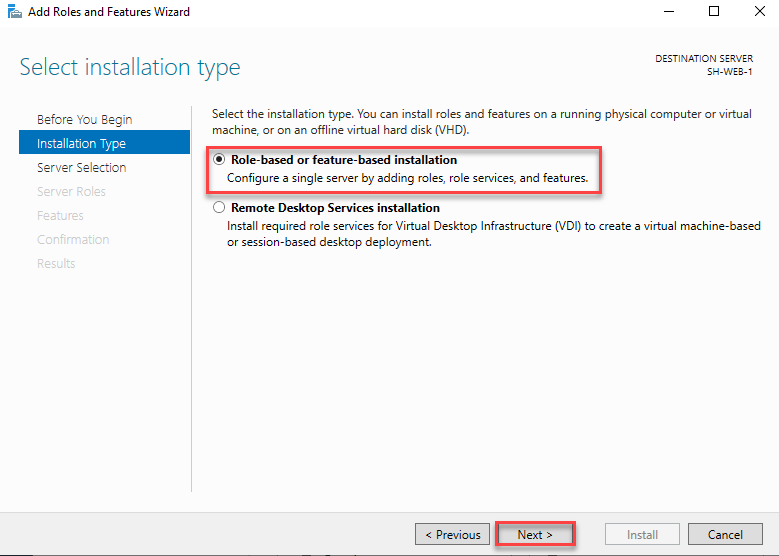
Inside Add Roles and Features Wizard, select Role-based or feature-based installation and click Next.
Step 3 : Select Role-based
Select the first radio button.
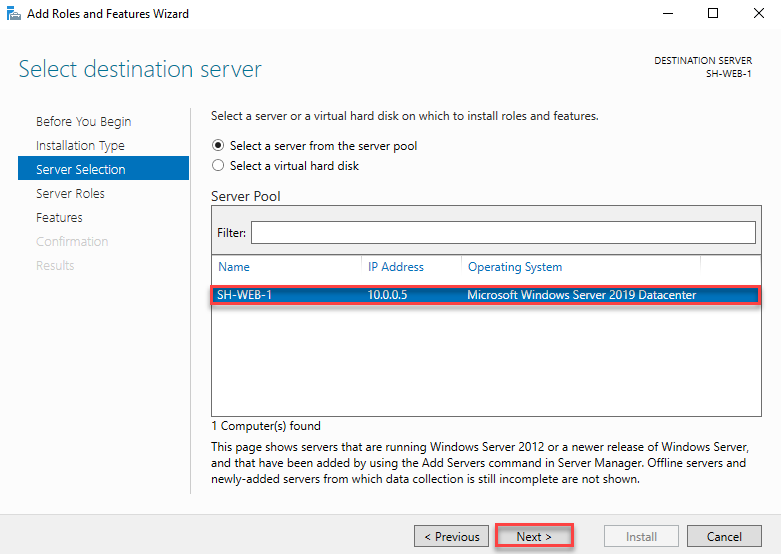
Step 4 : Select server name
By default, it will choose current server name, click Next to proceed.
Step 5 : Select Web Server (IIS)
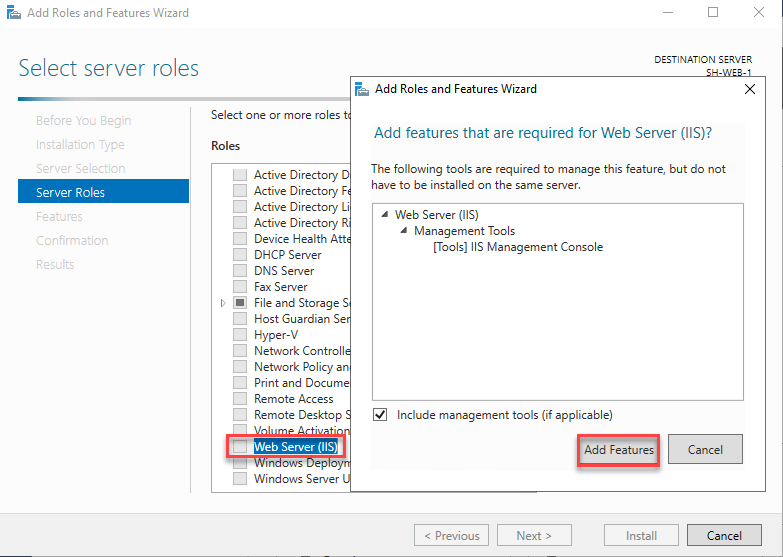
From the list, find Web Server (IIS), tick the box, click Add Features.
Step 6 : Verify Server Roles Selected
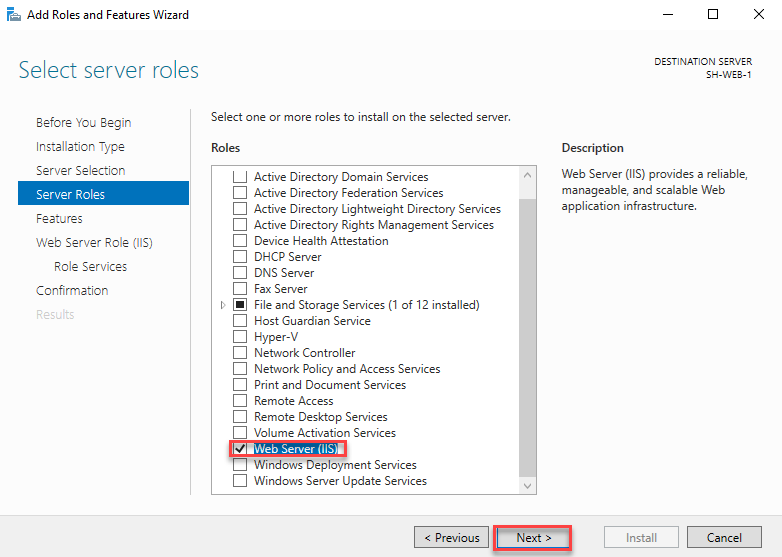
Verify that Web Server has been selected.
Step 7 : Verify Features Selected
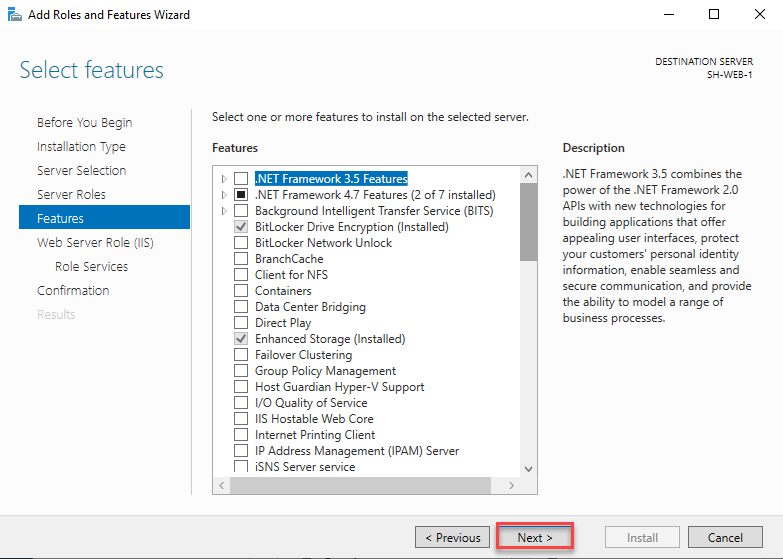
Next, wizard will display the role you are trying to install, click Next once confirmed.
Step 8 : Display Selected Server Role
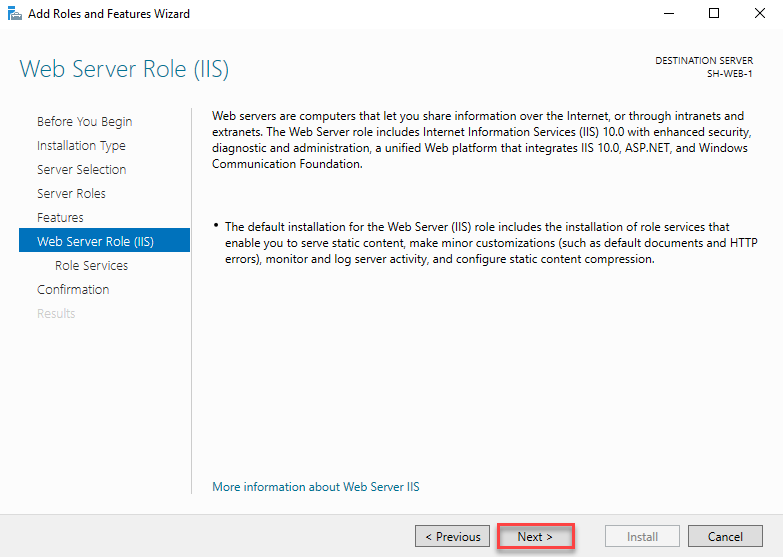
You may also add extra services, as for now, just click Next.
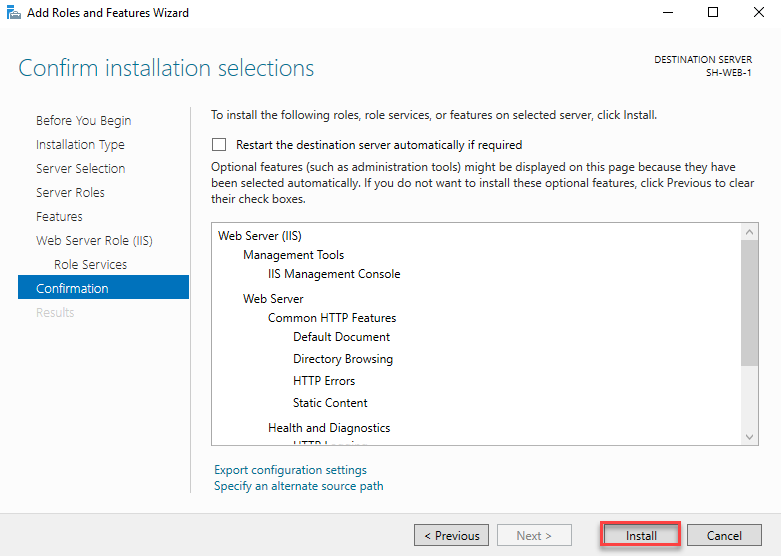
Step 9 : Confirm installation
Click Install to start the installation process.
Step 10 : Installation In Progress
The installation is in progress, you may close the wizard and wait for the complete notification.

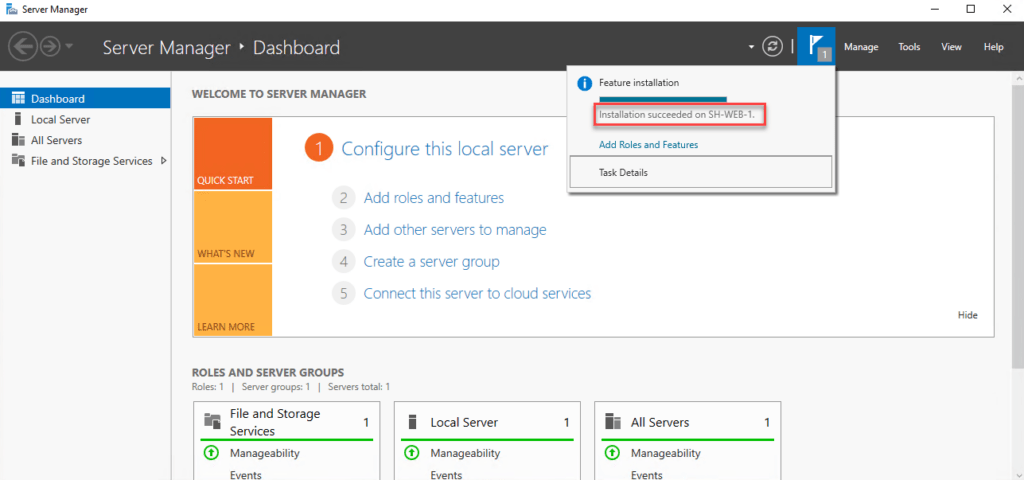
Step 11 : Installation Complete
After the installation complete, you may find the notification inside the Server Manager on the flag icon.
Installed IIS features using PowerShell
Step 1 : Run Installation Script
Open PowerShell and run below script
Install-WindowsFeature Web-Server -IncludeManagementTools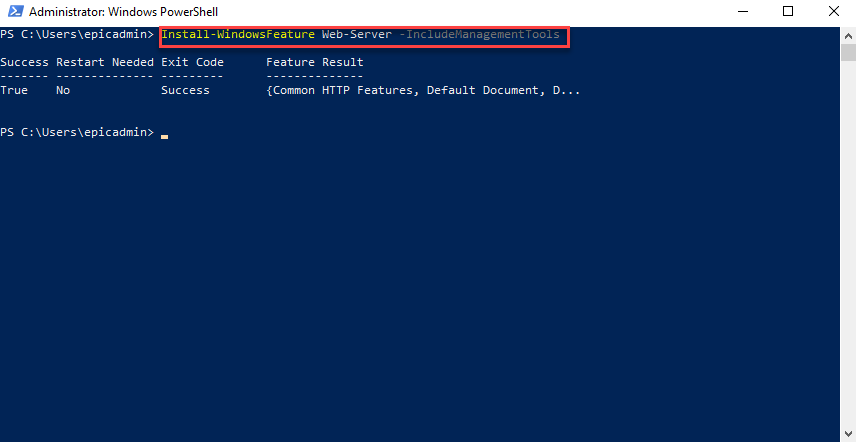
Verify Installation
Verify the installations by using below script.
Get-WindowsFeature | Where-Object {$_.InstallState -eq 'Installed'}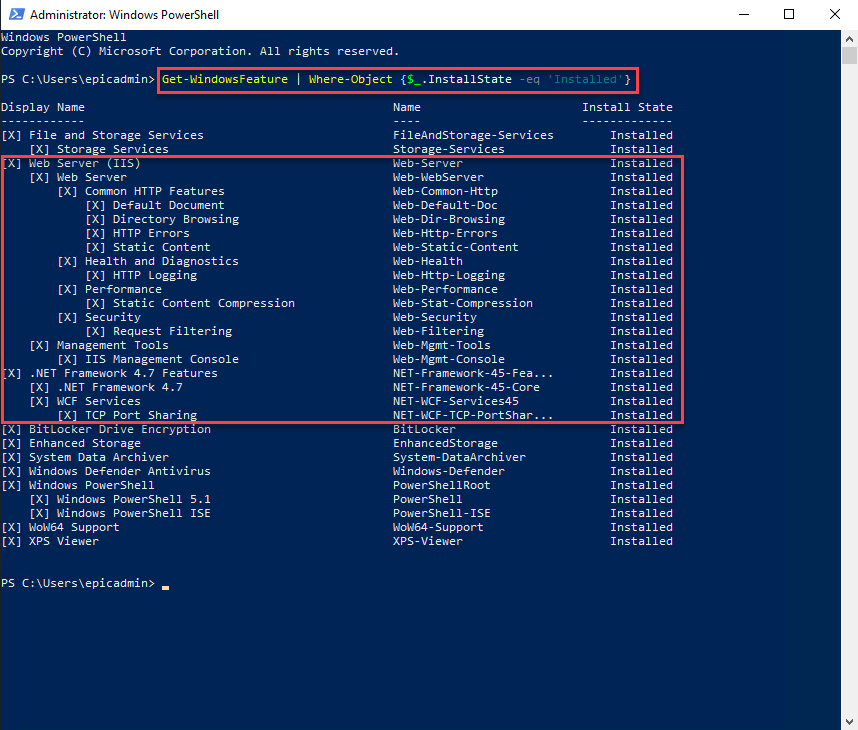
Let’s try to open the website, browse through this link on the server’s browser.
Browser will display default web page by Windows.
http://localhost/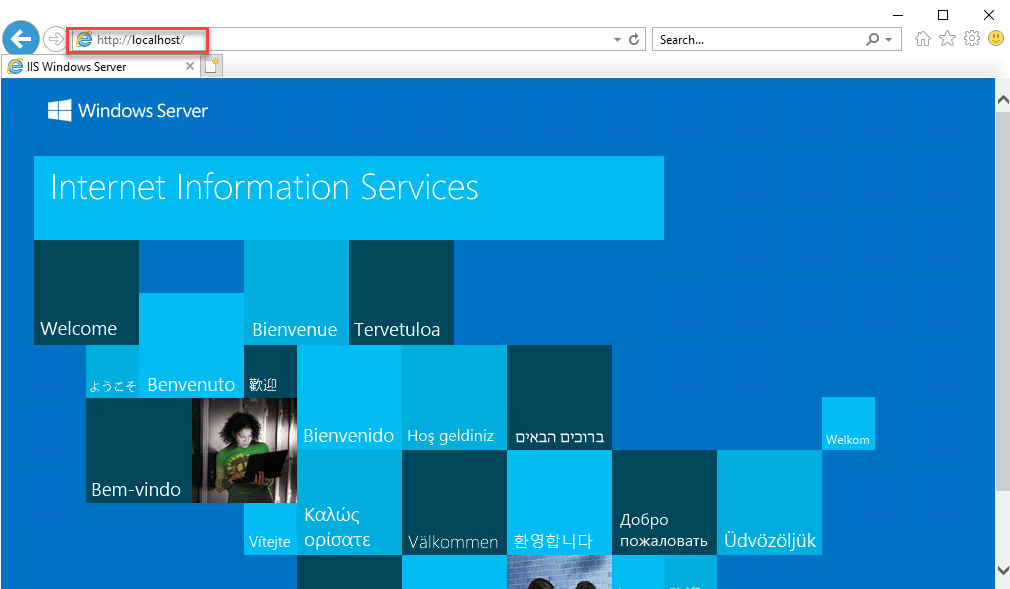
Resources
• https://docs.microsoft.com/en-us/windows-server/networking/core-network-guide/cncg/server-certs/install-the-web-server-web1
• https://www.ionos.com/help/server-cloud-infrastructure/server-administration/installing-iis-on-a-server-with-windows-server-minimal-installation/
• https://enterprise.arcgis.com/en/web-adaptor/latest/install/iis/enable-iis-2016-components-server.htm
• https://redmondmag.com/articles/2018/10/31/powershell-windows-server-roles-features.aspx